
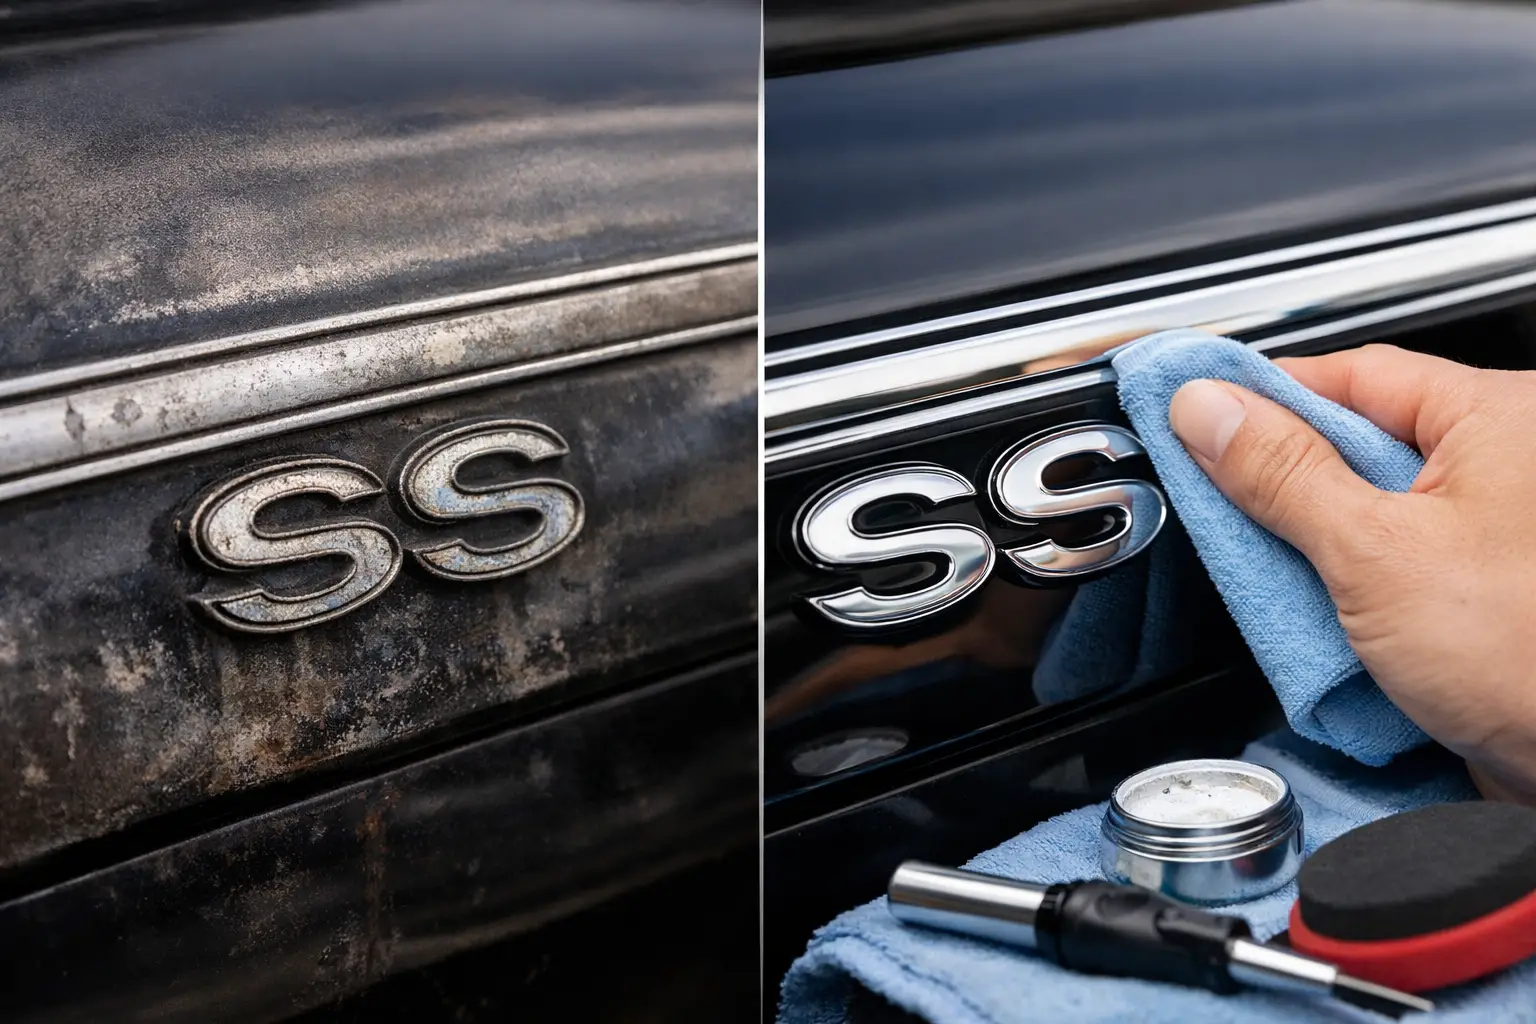
A straight, bright molding line can make or break a Chevelle SS. You can have fresh paint, a strong drivetrain, and a detailed interior, but if the trim is wavy, pitted, or fitted poorly, the whole car looks unfinished. That is why a chevelle SS trim restoration example is so useful – it shows where the real work is, where you can save original pieces, and where replacement parts make more sense.
For most 1964-72 Chevelle SS restorations, trim work falls into an awkward middle ground. It is not as glamorous as paint, and it is not as straightforward as bolting on suspension parts. Stainless pieces can often be saved, aluminum trim may need more careful correction, and die-cast components with heavy pitting can quickly turn into expensive lessons. The best results come from treating trim as its own phase of the restoration, not something left for the last weekend before assembly.
What this Chevelle SS trim restoration example shows
A realistic Chevelle SS trim project usually starts with three conditions. First, some original trim is solid but scratched. Second, a few pieces are dented or bent from years of removal and reinstallation. Third, several components are simply too far gone, especially pot metal parts exposed to moisture and age.
On a typical SS, that means evaluating wheel opening moldings, rocker moldings, drip rail trim, windshield and rear glass reveal moldings, grille trim, taillight bezels, headlight bezels, and assorted emblems and hardware. Not every part should be handled the same way. Stainless steel responds well to patient straightening and polishing. Soft aluminum can improve, but it marks easily and does not forgive aggressive buffing. Die-cast trim often looks better after replating, but cost and turnaround time can push many restorers toward quality replacements.
That is where experience matters. Factory-correct appearance is not only about shine. It is about edge profile, clip engagement, finish texture, and how the part sits against the body line. A piece that is technically new but shaped poorly can stand out just as much as a damaged original.
Start with inspection before you buy anything
The smartest trim restoration work begins on a bench, not in a shopping cart. Clean every piece first with wax and grease remover or mild soap and water, then inspect it under direct light. Dirt hides shallow dents, old adhesive masks edge damage, and oxidized metal can look worse or better than it really is until it is cleaned.
Separate pieces into three groups: restore, replace, and compare later. The restore pile usually includes straight stainless trim with light scratches and minor dings. The replace pile should include cracked die-cast pieces, deeply pitted bezels, and moldings with stretched edges or broken mounting sections. The compare later group is where judgment comes in. Some originals have better shape than reproduction parts, even when the surface needs work.
This stage also tells you which hardware you need. Many trim problems are not actually caused by the trim itself. Missing clips, weak studs, rusted fasteners, and incorrect seals can pull moldings out of line. If you reuse tired attaching hardware, even the best part can fit like a bad reproduction.
Why original trim is still worth saving
Original GM trim often has cleaner lines and more consistent fit than lower-grade replacements. That is especially true on reveal moldings and body-side pieces where the contour has to follow the panel exactly. If a stainless molding is fundamentally straight and all mounting points are usable, restoration is usually worth the effort.
The exception is time. If you are building a solid driver and need dependable results quickly, replacing a few marginal pieces may be the better move. There is no trophy for spending ten hours on a molding that still ends up with a soft edge and visible ripple.
Restoring stainless and aluminum trim
In a practical chevelle SS trim restoration example, stainless trim is where you usually get the best return on effort. Light dents can often be worked out from the back side using trim tools, a soft-faced hammer, and a patient hand. The goal is not to force the metal flat in one shot. It is to gradually return the profile without stretching the piece.
After straightening, sanding and polishing remove scratches and bring the finish back. Coarser abrasives are only for deeper damage. On cleaner trim, starting too aggressively creates more work and can round sharp factory lines. That is one reason experienced restorers move slowly here.
Aluminum trim is different. It is softer, easier to scar, and easier to over-polish. If the piece has prominent anodizing damage or severe deformation, restoration may not produce a clean factory-style look. In those cases, replacement can be the more reliable path, especially on a car where consistency matters more than saving every original part.
The common mistake with polished trim
Over-restoration is a real issue. Many trim pieces should look bright, but not every surface should resemble chrome plating. A mirror-like finish can look impressive on the bench and wrong on the car. Factory appearance usually has a more controlled sheen, with crisp lines that match adjacent trim and brightwork.
That matters most when you are blending restored originals with new replacement components. If one rocker molding is polished far beyond the others, the mismatch is obvious once the car is in the sun.
When replacement trim is the better choice
Some parts are simply not good candidates for restoration. Pot metal headlight bezels, taillight bezels, and grille trim often suffer from pitting under the plating. You can fill, plate, and refinish these parts, but the cost adds up quickly, and not every plated part comes back with the detail you want.
For many owners, high-quality replacement parts are the practical answer. The key phrase is high-quality. Fitment, finish, and profile accuracy matter more than the lowest price. A trim piece that saves money upfront but needs reworking, slotting, bending, or extra shimming is not really a bargain.
This is where working with a true A-body specialist helps. Stock depth matters because one project rarely needs just one part. If you are replacing wheel opening moldings, reveal molding clips, emblem hardware, weatherstripping, and bezels at the same time, you want one source that understands the platform and can help you sort out year-specific differences before parts hit the garage floor.
Fitment is where trim restoration succeeds or fails
Even well-restored trim can look wrong if it goes on a car with uneven panels, incorrect glass setting, or reproduction weatherstripping that is too thick. Trim is a finishing component, but it depends heavily on everything under it.
Windshield and rear window reveal moldings are the classic example. If the glass is not seated correctly or the clips are mismatched, the molding will not sit flat. Owners sometimes blame the trim when the real issue is clip height, channel condition, or glass installation.
The same is true with rocker moldings and wheel opening moldings. If the lower body line has repair variation from prior sheet metal work, the trim may highlight it instead of hiding it. That is not a reason to avoid installing the molding. It is a reason to test-fit early, before final assembly pressure sets in.
Test-fit before final finish whenever possible
If a part needs polishing, minor adjustment, or hardware verification, do it before the final push to complete the car. Test-fitting reveals whether a molding needs clip correction, whether a replacement bezel aligns with adjacent panels, and whether emblem studs sit correctly in the body openings.
That step is especially valuable when mixing NOS, used, and reproduction parts. In the real world, many successful Chevelle restorations use all three. The cleanest outcome comes from checking how those pieces work together before the car is fully dressed.
Balancing factory-correct goals with real-world budgets
Every trim restoration has a decision point between perfect and practical. A judged show car may justify replating rare originals and spending extra time on subtle detail differences. A high-quality street restoration may benefit more from carefully selected replacement trim, new hardware, and restored stainless originals where the fit is best.
Neither approach is wrong. What matters is consistency. A car with straight moldings, correct finish, solid mounting hardware, and clean alignment usually looks better than one with a few expensive restored pieces mixed with worn or poorly fitted trim elsewhere.
That is why buying strategy matters as much as restoration technique. Owners who source trim, clips, seals, emblems, and related hardware from a specialized supplier tend to avoid the stop-and-start frustration that delays projects and leads to compromised fitment. Classic Parts has built its reputation around exactly that kind of support for Chevelle, Malibu, and El Camino restorers who want dependable fit and factory-style results.
A good trim job does not beg for attention. It just makes the whole car look right. If you treat trim as a serious part of the restoration instead of an afterthought, your SS will show it every time the light hits the body line.