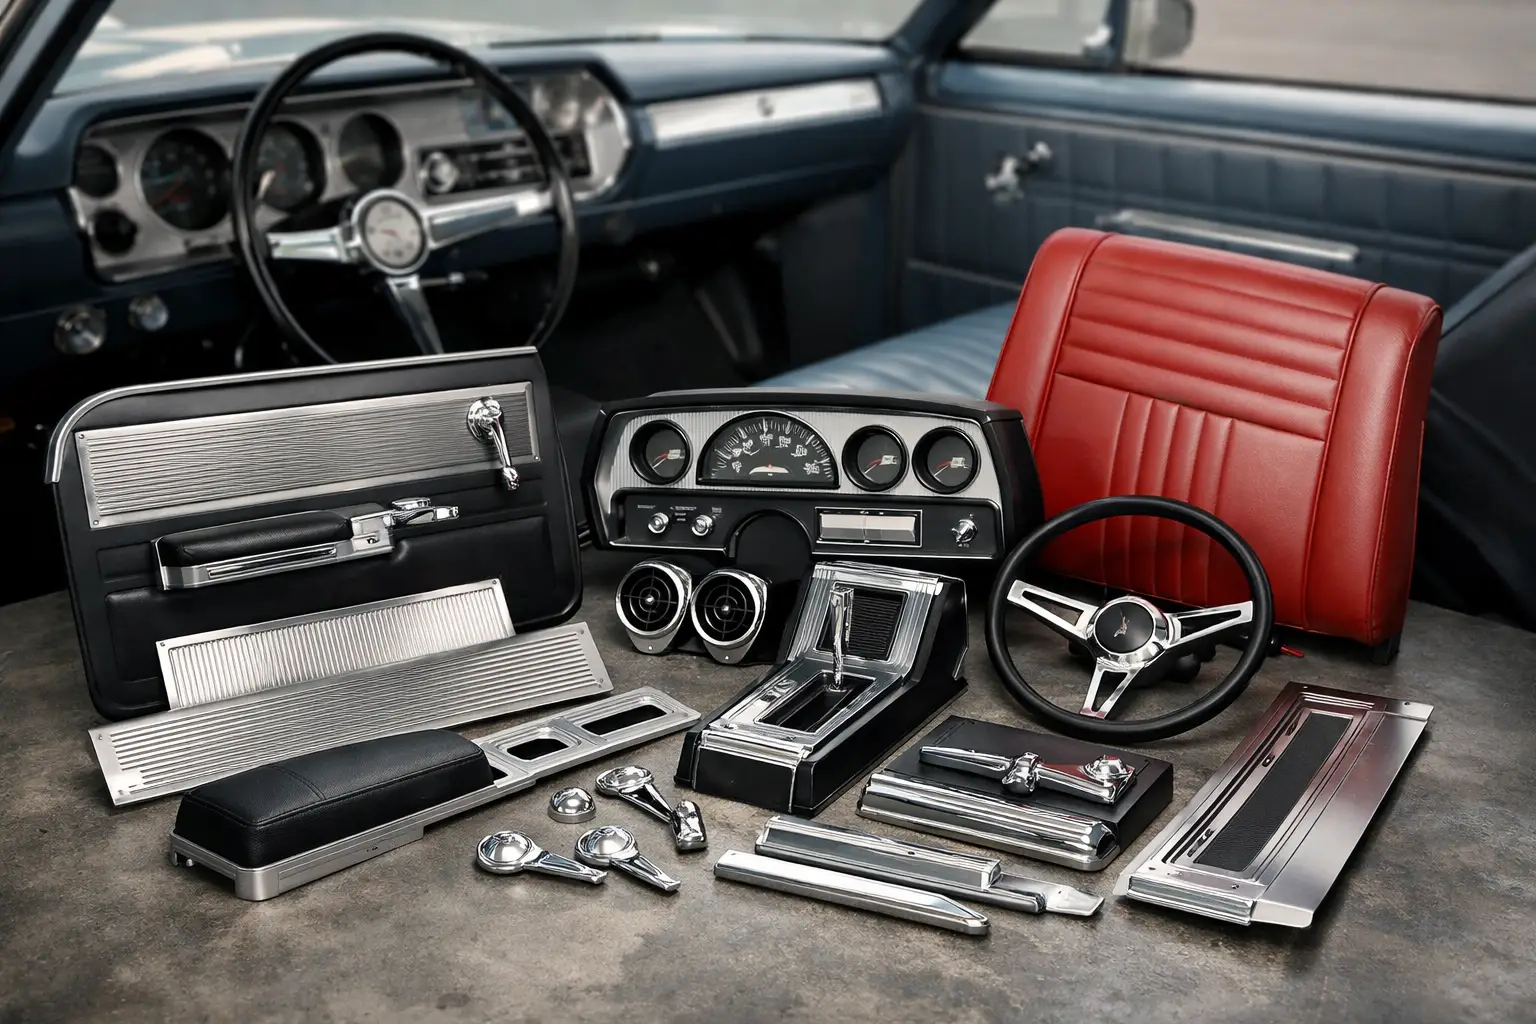
A 1964 Malibu interior tells on the whole car. You can have straight body panels and fresh paint, but if the dash trim is pitted, the sill plates are scuffed, or the seat moldings do not fit right, the car still feels unfinished. That is why sourcing the right 1964 Malibu interior trim parts matters so much. These are the details that turn a driver-quality refresh into an interior that looks correct, fits properly, and holds up over time.
For most restorers, the challenge is not deciding whether to replace interior trim. It is figuring out which pieces are model-specific, which parts interchange, and where reproduction is the right call versus chasing original GM or quality used components. On a 1964 Malibu, that decision often comes down to condition, budget, and how factory-correct you want the finished car to be.
What counts as 1964 Malibu interior trim parts?
Interior trim covers more than the obvious brightwork. On a 1964 Malibu, it can include dash trim, instrument bezel components, door panel moldings, armrest bases, sill plates, seat side trim, rear side panel trim, garnish moldings, windshield and back glass interior moldings, pedal trim, package tray details, and the many clips, screws, and retainers that keep everything aligned.
Some of these parts are highly visible every time you open the door. Others disappear into the interior once installed, but they still affect fit and finish. A warped molding or missing retainer can leave gaps, rattles, and uneven panel lines that stand out immediately in a well-restored car.
This is also where many owners lose time. They order the obvious trim pieces, then realize the hardware, backing plates, or mounting clips are either missing or too damaged to reuse. If you are already pulling the interior apart, it usually pays to think in systems instead of single parts.
The 1964 Malibu interior trim parts that usually need attention
The first wear points are usually the door openings and lower cabin areas. Sill plates, kick panel trim, pedal trim, and lower moldings take years of shoe contact and moisture. Even solid original pieces often show scratches, dulling, or corrosion here.
Dash and gauge-area trim is another common problem area. Sun exposure, age, and repeated removal over the decades can leave bezels faded, pitted, or cracked around mounting points. If the goal is a clean, factory-style presentation, these parts make a big difference because they sit directly in the driver’s line of sight.
Seat trim and interior side moldings deserve close inspection too. Bucket seat trim, bench seat side pieces, and rear quarter interior trim often suffer from broken tabs or previous repairs. They may still be present, but that does not mean they are reusable. Chrome-like finishes can peel, plastic can shrink, and mounting holes can elongate enough to create a loose fit.
Then there are garnish moldings around the windshield, rear glass, and side areas. These are easy to overlook during ordering, especially if the car came apart years ago. But once the headliner and glass-related work are done, missing or damaged garnish moldings become a major visual issue.
Fitment is where many restorations go sideways
Not every A-body interior part is interchangeable just because it looks close. On paper, the 1964 Malibu shares plenty with Chevelle platform cousins, but trim details can vary by body style, interior level, and seat configuration. Hardtop, sedan, convertible, and wagon applications can all introduce differences that matter once you start bolting parts on.
That is why body style should be confirmed before ordering anything decorative or molded. A part that is nearly right is often the part that wastes the most time. It may install with force, leave a gap, or interfere with another panel. The result is an interior that never quite settles the way it should.
This is also where working with a specialist matters. A supplier focused on 1964-72 GM A-body cars is much more likely to know the usual fitment traps, identify missing companion pieces, and help you sort out whether reproduction, NOS, or used trim makes the most sense for your build.
Reproduction, NOS, or used – which is best?
There is no single answer, because it depends on the part and the standard of the restoration.
Reproduction interior trim parts are often the practical choice for a car that needs clean, presentable components without the hunt. Good reproductions can restore the proper appearance, save refinishing time, and solve the problem of missing or badly damaged originals. For many drivers and weekend show cars, that is the right balance.
NOS parts appeal to owners chasing originality and factory detail. When available, they can offer the closest thing to assembly-line fit and finish. The trade-off is cost and availability. Some pieces are simply too scarce to build a restoration plan around, especially if you need multiple trim items at once.
Used original parts can be a smart middle ground, particularly for pieces that were built well by GM but are no longer reproduced correctly. The key is condition. Lightly restorable used trim may be a better buy than a poor reproduction, but heavily pitted or repaired originals can become expensive once refinishing is factored in.
How to buy 1964 Malibu interior trim parts without ordering twice
Start with a complete inspection before you place an order. Do not rely on memory, and do not assume that what came off the car is correct for the car. Plenty of Malibus have lived through decades of repairs, part swaps, and incomplete restorations.
Photograph each area of the interior before disassembly if possible. Then compare left and right side components, check mounting points, and note any hardware that looks homemade or mismatched. Many trim problems start with missing clips or substituted fasteners that distort the part during installation.
Next, group your parts by area. Dash, doors, seating, quarter trim, garnish moldings, sill plates, and hardware should each be reviewed together. Buying this way helps prevent the common problem of replacing one visible trim piece while leaving worn adjacent parts that make the new component stand out for the wrong reason.
It also makes sense to think ahead about soft goods and interior color. New trim installed next to faded panels, tired armrests, or worn weatherstripping can expose issues you were not planning to address yet. Sometimes that is fine for a phased restoration. Other times, it is worth waiting until you can refresh the full section properly.
Installation quality matters as much as part quality
Even well-made trim can look wrong if the surrounding structure is not prepared. Before installing new parts, clean mounting surfaces, repair bent tabs, confirm hole alignment, and replace worn clips. If a panel underneath is warped or a fastener is pulling at an angle, the trim will tell on it immediately.
Take extra care with polished or finished pieces. Test-fit first, then protect surfaces during assembly. Many scratches happen during installation, not shipping. With older cars, patience usually saves more frustration than force.
If you are reinstalling multiple trim components in one area, loosely fit everything before final tightening. That gives you room to adjust alignment and panel gaps. On a 1964 Malibu interior, small corrections add up to a much more original appearance.
What separates a dependable supplier from a general parts seller
Interior trim is one of the categories where specialization pays off fast. A dependable supplier should offer more than a part number and a generic photo. You want real category depth, accurate application coverage, and support from people who understand 1964-72 A-body differences.
Inventory breadth matters too. Restorers rarely need one trim part. They need the molding, the clip set, the screws, the related panel piece, and sometimes the weatherstrip or hardware kit that affects final fit. When one source can cover those needs, the project moves faster and with fewer surprises.
That is one reason enthusiasts have trusted Classic Parts for decades. When you are restoring a 1964 Malibu, access to hard-to-find items, reproduction options, and knowledgeable support is not just convenient. It reduces mistakes that cost time and money.
Getting the interior right is worth the effort
The best 1964 Malibu interiors do not look overdone. They look correct, tight, and complete. The trim sits where it belongs, the finishes match the character of the car, and nothing feels like an afterthought.
If you are buying 1964 Malibu interior trim parts, treat them as part of the restoration foundation, not the finishing touch you deal with later. The right pieces, chosen carefully and installed with attention, change how the whole car feels the moment you open the door.