
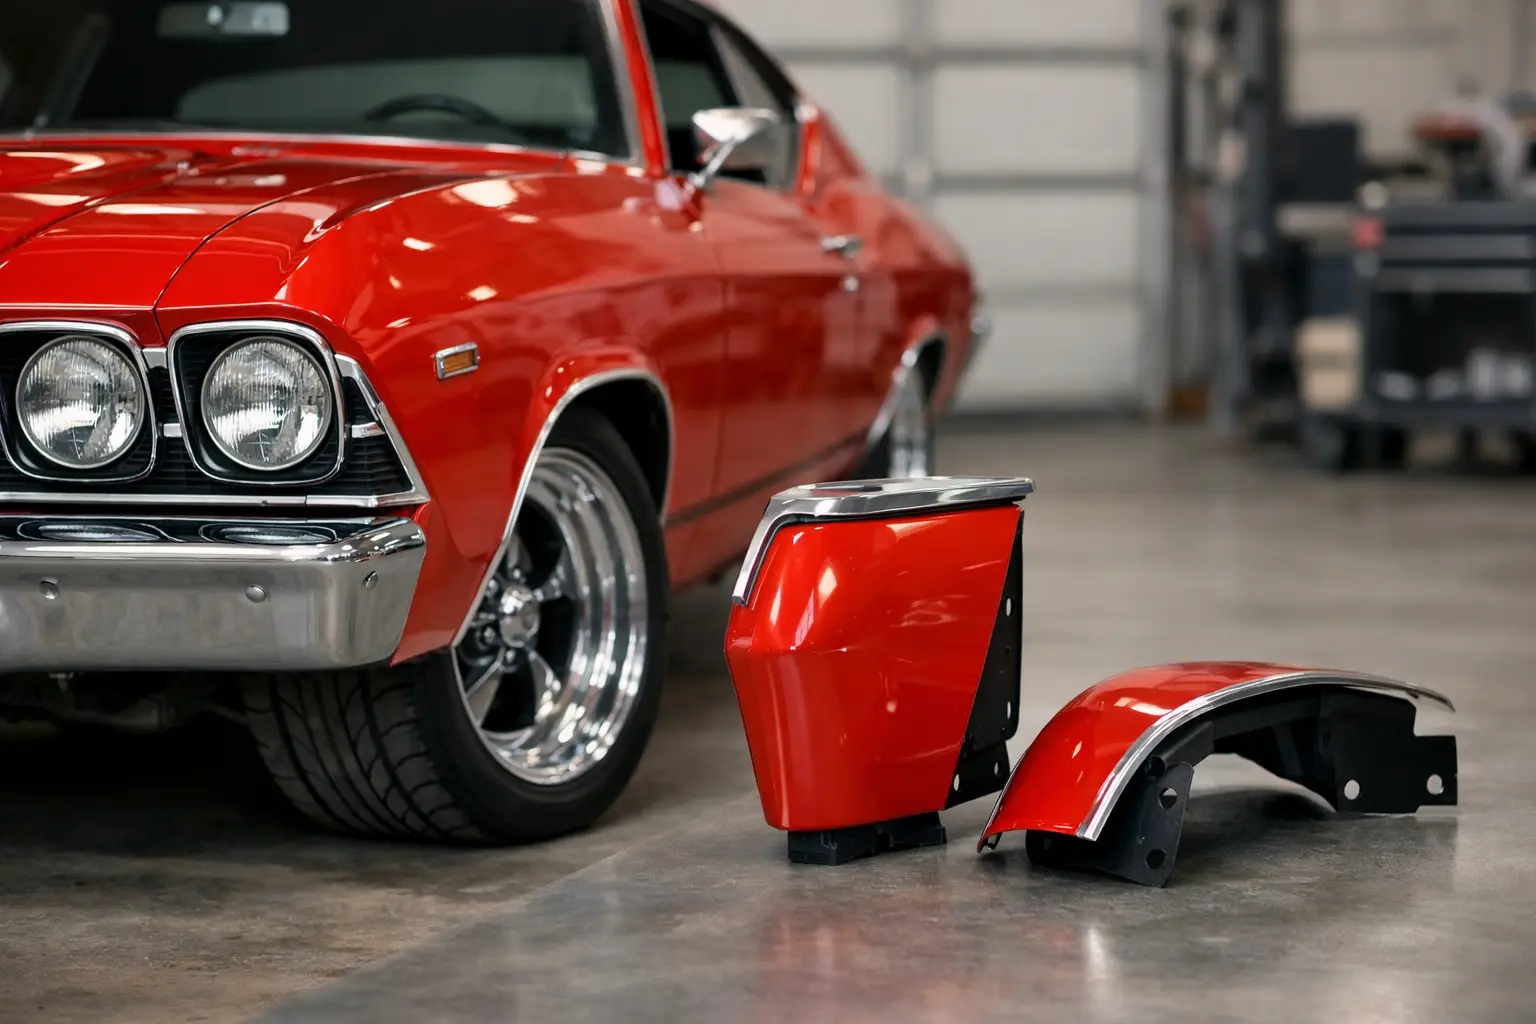
A 1969 Chevelle front end can look complete from ten feet away and still tell a different story up close. Uneven gaps at the grille, a bumper that sits slightly proud on one side, or a headlamp door that refuses to line up often trace back to the pieces between the main fenders and the front-end assembly. That is why choosing and fitting 1969 Chevelle fender extensions deserves more care than simply ordering a left and right panel.
These panels help establish the visual line of the front clip. On a car restored for local cruise nights, judging, or long-term collector value, the difference shows. The right extensions, correct hardware, and a patient test-fit process protect the factory appearance that makes a 1969 Chevelle instantly recognizable.
What Fender Extensions Do on a 1969 Chevelle
Fender extensions fill the transition area at the front of the fenders, where the outer sheet metal meets the grille, headlamp-area components, bumper, and related trim. They may be small relative to the hood or fenders, but they influence several important gaps at once.
A properly fitted extension helps create a consistent line from the fender into the front-end opening. It also gives the grille and bumper surrounding parts the support and spacing they were designed to have. When an extension is bent, rusted, incorrectly reproduced, or installed under tension, the symptoms can show up elsewhere. The hood-to-fender gap may look acceptable while the grille sits crooked, or the bumper may appear misaligned even after its brackets have been adjusted.
For that reason, extensions should be treated as part of a system. Evaluate them alongside the fenders, radiator support, grille, bumper brackets, headlamp doors, and mounting hardware. Replacing just one damaged panel can be the right repair, but it calls for a careful comparison with the original panel on the other side.
Buying 1969 Chevelle Fender Extensions With Confidence
The 1969 Chevelle has a one-year front-end appearance. Do not assume a similar-looking extension from a 1968 or 1970 A-body will interchange cleanly. Small differences in contours, mounting locations, trim relationships, and grille openings can turn an apparent bargain into extra bodywork.
Start by verifying that the part is specifically intended for a 1969 Chevelle application and that you are ordering the correct side. Driver-side and passenger-side extensions are not interchangeable. Before purchasing, compare the mounting flange layout, leading edge shape, lower mounting area, and visible contour against the panel being removed whenever possible.
Reproduction, Used, or NOS: The Right Choice Depends on the Build
A quality reproduction extension is often the practical choice for a driver restoration or a car with corrosion too extensive to repair. The benefit is clean material and ready availability. The trade-off is that reproduction sheet metal can require minor adjustment before it matches the surrounding original panels. That is normal restoration work, not necessarily a sign of a bad part.
A used original GM extension can offer factory stamping and original contours, which is valuable on a preservation-minded build. Its condition matters more than its age. Look closely for rust at mounting flanges, pitting under old paint, previous collision repair, stretched metal around bolt holes, and filler hiding at the visible edge. An original piece that needs extensive metal repair may cost more time than a new panel is worth.
NOS parts are attractive when factory originality is the priority, but availability and price can make them less practical. They should still be inspected. Decades of storage can leave surface rust, shelf wear, or damaged edges. Factory packaging does not eliminate the need to test-fit.
For restorers balancing authenticity, budget, and turnaround time, the best choice is the panel that gives the car sound metal, dependable fitment potential, and the right level of originality for the finished vehicle.
Test-Fit Before Paint and Final Assembly
The most expensive fitment mistake is painting an extension before confirming its relationship to the rest of the front clip. Even a well-made panel may need a small amount of adjustment, and paint adds another consideration at every edge.
Begin with the car on level ground and make sure the radiator support, core support bushings, fenders, and hood are already in their intended positions. If the body mounts are collapsed or the radiator support is sitting low, extension alignment will be misleading. Correct those foundation issues first.
Install the extensions loosely with the proper bolts and any original-style shims or washers required by the assembly. Then install or position the grille, headlamp-area components, and bumper before tightening everything down. The goal is not to make one gap perfect while forcing another gap out of shape. Work across the front end and look for a balanced overall result.
Set the Major Panels First
Set hood-to-fender alignment before chasing the extension-to-grille gap. Next, confirm that both fenders sit consistently at the radiator support and that the grille opening is centered. Once those larger relationships are stable, the extensions can be adjusted to refine the visible lines at the front corners.
Avoid using the extension as a correction for a twisted fender, an incorrectly positioned radiator support, or bent bumper brackets. It may seem to improve one view of the car, but it usually creates stress in the panel or leaves another gap visibly wrong. Good restoration work follows the assembly order rather than fighting it.
Use low-tack tape along painted edges during mock-up to prevent chips. A few reference measurements and clear photos before disassembly can also save hours when the car is being reassembled after bodywork.
Hardware Matters More Than It Seems
Old hardware is often the hidden reason a panel will not sit where it should. Rusted bolts can seize, incorrect fasteners may bottom out, and enlarged holes can allow the extension to shift after final adjustment. Missing washers can also damage fresh paint and change how a flange pulls against the fender.
Use correct-style mounting hardware whenever possible, especially where bolt head size, washer diameter, or thread length affects clearance. Clean threaded holes before assembly. If a captive nut is damaged or a mounting hole has been distorted by rust, repair it properly instead of forcing the bolt. Forcing hardware can pull a clean panel out of alignment and create new damage at the flange.
A light coating of appropriate corrosion protection on concealed bare metal and fastener threads helps preserve the repair. Keep any coating away from visible paint surfaces and areas where it could interfere with grounding or final paint adhesion.
Common Fitment Problems and What They Usually Mean
When one extension sits too far forward or back, start by checking the fender’s position at the radiator support and the condition of the extension mounting flanges. A small bend at a flange can move the visible edge more than expected.
If the gap to the grille is uneven from top to bottom, inspect the grille mounting points and the radiator support before modifying the extension. Grilles can warp, supports can shift, and old collision damage may have left one side of the front clip slightly out of square.
A bumper that appears too close to one extension is not always an extension problem. Check bumper brackets, bracket mounting holes, frame horn condition, and whether the bumper itself has been tweaked. Adjusting the extension to hide a bumper issue can leave the fender line looking wrong.
If a reproduction panel fits at the mounting points but needs a slight contour adjustment at the visible edge, a skilled body technician can usually refine it during mock-up. Major reshaping, elongated holes, or heavy force are different matters. Stop and recheck part application, surrounding panel alignment, and damage in the car’s existing sheet metal before proceeding.
Build the Front End as a Complete Restoration System
A 1969 Chevelle front end comes together best when its parts are sourced and planned as a group. Extensions, grille components, headlamp-area parts, bumper hardware, fender bolts, seals, and mounting pads all affect the final result. Ordering the related components together reduces delays and gives you the chance to compare fit before paint work begins.
Classic Parts has spent more than 40 years helping Chevelle, Malibu, and El Camino owners locate restoration parts that are difficult to find and easy to get wrong. For a factory-minded build, that specialist knowledge matters just as much as the part itself. Ask fitment questions before bodywork starts, particularly when the car has prior collision repair, mixed-year parts, or incomplete original hardware.
Give these small panels the same attention you would give the hood or fenders. With sound metal, correct hardware, and a deliberate mock-up, the front corners will carry the crisp, confident alignment your 1969 Chevelle deserves every time the garage door opens.