
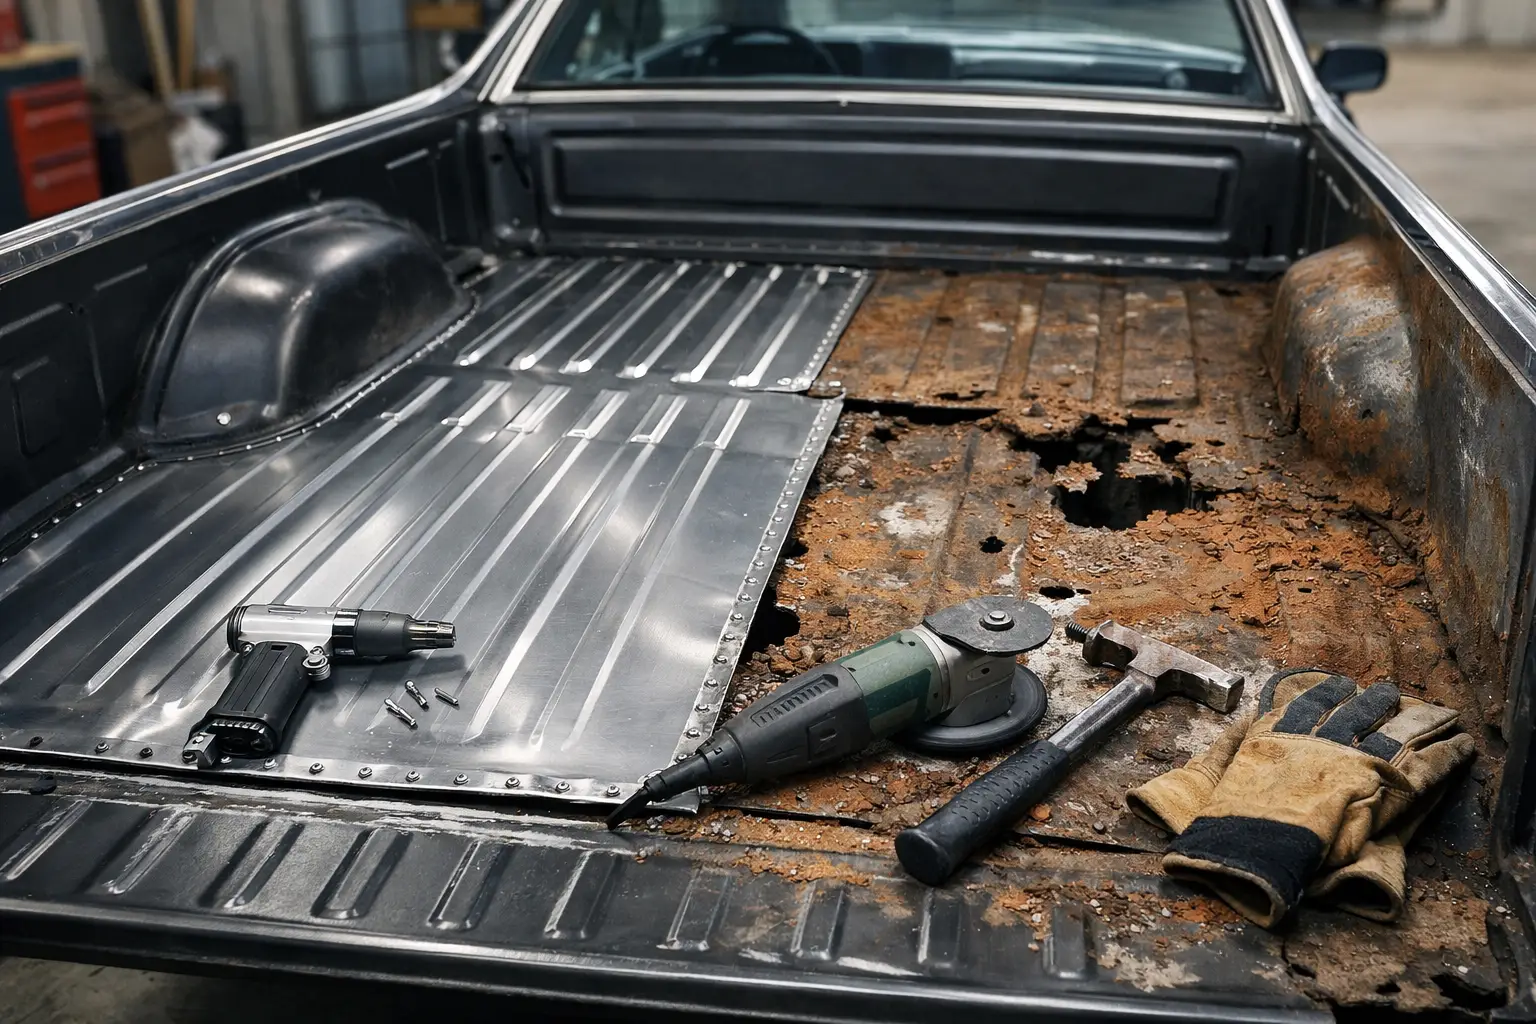
A wavy bed floor tells you a lot about an El Camino. Usually it says the truck lived a working life, held moisture under mats or wood strips, and now needs more than filler and paint. This el camino bed floor repair example is built around what restorers actually face – rust at the ribs, soft spots near the wheelhouses, stretched metal at the tailgate opening, and old patchwork that never fit right in the first place.
For most 1968-72 El Caminos, bed floor repair lands somewhere between a simple patch and a full bed replacement. The right approach depends on how much original structure is left, how correct you want the truck to be, and whether you are building a driver or a higher-end restoration. The goal is not just to make the floor look flat again. The goal is to restore strength, preserve factory lines, and avoid doing the same job twice.
What this El Camino bed floor repair example starts with
Before any cutting starts, inspect the entire bed as an assembly, not just the rusty area. A floor panel can look bad on top and still have usable supports underneath. The opposite is also common – the top skin looks repairable, but the braces, rear crossmember area, or wheelhouse edges are weak enough that patching the floor alone will not last.
Start by checking the bed floor ribs for pinholes and thinning metal. Push around the seams at the wheelhouses and along the front bed panel. Then inspect under the bed for support channels, spot weld separation, and old repairs. If the floor oil-cans when you press on it, you may be dealing with stretched metal in addition to corrosion.
In a typical repair example, the worst damage shows up in three places. First, the center ribs trap moisture and rust from the inside out. Second, the rear section near the tailgate takes impact damage and often gets patched poorly. Third, the edges near the wheel tubs collect dirt and stay wet. Those zones matter because they affect how much panel you should replace.
Repair section or full panel?
This is where experience saves money. If rust is limited to one local area and the surrounding ribs are still sharp and solid, a repair section can make sense. It keeps more original metal in the truck and usually reduces labor on alignment. But if you have rust in multiple ribs, weak seams at both wheelhouses, and previous patches layered over bad metal, a larger bed floor section is usually the better value.
Many restorers lose time trying to save too much. Small patches are attractive until you are fabricating rib profiles, chasing thin edges, and welding around distorted metal. A full floor section costs more up front, but it often gives you better fit, cleaner factory lines, and less finishing work. That trade-off matters if you care about a straight bed and long-term durability.
For a driver-level truck, a well-installed section repair is perfectly valid. For a factory-style restoration, larger stamped panels usually produce the cleaner result. It depends on budget, tool access, and how original the surrounding bed structure remains.
When a patch is enough
A patch is usually enough when the rust is isolated, the support structure below is intact, and the floor ribs can be matched cleanly. The cut should extend into solid metal well beyond visible corrosion. If you stop at the edge of thin metal, the repair will fail early or distort during welding.
When replacement is the smarter move
Replacement makes more sense when rust crosses several ribs, when old repairs are present, or when the panel has impact damage that has already stretched the metal. If your bed floor has broad waviness and multiple soft spots, you are usually better off replacing more, not less.
Measuring and bracing before you cut
An El Camino bed is part cargo area and part body structure, so panel replacement has to be controlled. Before removing anything major, measure the bed opening, tailgate gap, and wheelhouse relationships side to side. Record those numbers. Photograph rib alignment, seam locations, and support placement from above and below.
If you are replacing a large section, add temporary bracing so the bed does not shift. This is especially important on trucks already apart for quarter or tail panel work. Losing alignment here creates extra work later at the tailgate, rear bumper, and trim areas.
Mark your cut lines where they will be easiest to hide and easiest to weld without warping. Avoid unnecessary short zig-zag cuts. Straight, deliberate cuts are easier to fit and finish, and they usually produce a stronger repair.
Cutting out the damage without creating more work
The best repair work removes only what is bad, but all of what is bad. Cut conservatively first, then trim to final size as you expose the metal underneath. Separate factory spot welds cleanly wherever possible. Tearing through support flanges with a cutoff wheel may seem faster, but it creates extra reconstruction work and can weaken the attachment points for the new panel.
Once the rusted section is out, clean every mating surface. Surface rust on supports should be addressed now, not after the new panel is in place. If a brace is thin or perforated, replace or repair it before installing the floor. A new top panel over bad structure is a short-term fix.
This stage also tells you whether your original repair plan was realistic. It is common to uncover more corrosion at the wheelhouse seams or front bed panel lip than you could see from above. If that happens, adjust the scope before welding anything in. Good restorations stay flexible when the metal tells a different story.
Test-fitting the new panel
A strong el camino bed floor repair example always includes dry fitting more than once. Set the new panel in place and clamp it everywhere it will eventually attach. Check rib alignment front to rear, wheelhouse fit, bed strip locations if applicable, and tailgate clearance at the back.
Do not force a panel into place and assume welding will straighten it. If the fit is off, identify why. The issue may be at the support flange, a remaining high spot in the original bed, or a reproduction stamping that needs light adjustment. Minor trimming is normal. Major persuasion usually means something upstream is wrong.
This is where specialist support and correct sheet metal matter. A properly stamped panel saves hours in shaping and finishing, especially on visible bed ribs where poor definition stands out immediately. Classic Parts has built its reputation on that kind of restoration confidence – having the right components available and helping owners avoid guesswork.
Welding strategy for a cleaner factory-style result
Heat control is everything on bed floors. Long welds on broad sheet metal invite warping, and once the ribs distort, the repair never looks quite right. Use short stitch welds where needed, moving around the panel to spread heat. Let the metal cool between passes.
Plug welds should be used where the factory attached the floor to supports and flanges. That keeps the structure close to original and restores strength where the bed takes load. Butt joints can look cleaner than overlap repairs on exposed areas, but they require accurate fit-up and more patience. Overlap joints are easier in some hidden locations, though they can trap moisture if not sealed properly.
After welding, grind carefully. The goal is to finish the weld, not thin the surrounding metal. Heavy grinding can flatten rib detail and make a good panel look mediocre. If a seam needs a lot of filler to disappear, the fit or welding probably needs another look.
Finishing work that decides how long the repair lasts
The difference between a quick repair and a lasting one is usually in the backside work. Every seam, flange, and weld area should be cleaned, protected, and sealed where appropriate. Bare metal under the bed is where repeat rust starts.
If you are restoring for originality, choose coatings and finishes that suit the truck’s intended level of correctness. If you are building a driver, durability may matter more than exact appearance under the bed. Either route is valid, but decide early so your prep and materials match the goal.
Also pay attention to the bed-to-wheelhouse seams and the rear edge near the tailgate. These are common moisture points. A clean repair with poor seam protection can come back faster than most owners expect, especially if the truck gets driven and washed regularly.
Common mistakes in an El Camino bed floor repair example
The most common mistake is patching visible rust while ignoring weak supports below. The second is cutting too small and welding into compromised metal. The third is rushing panel fit and trying to fix alignment with weld force.
Another frequent issue is mixing restoration goals. Owners sometimes buy a small patch to save money, then expect show-level panel lines and rib definition. That is not always realistic. The repair method should match the finish standard you want when the truck is painted and assembled.
Finally, do not underestimate how noticeable the bed floor is on an El Camino. Unlike a hidden trunk repair, this panel is in plain view every time the tailgate drops. Straight ribs, even gaps, and proper stamping lines make a real difference in how finished the vehicle feels.
A solid bed floor repair is one of those jobs that improves the whole truck at once – appearance, strength, and resale confidence. If you start with honest inspection, choose the right size repair, and take fitment seriously, the results look right and hold up. When the bed floor is finally straight, solid, and protected underneath, the rest of the restoration has a much better foundation to build on.