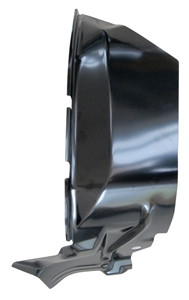

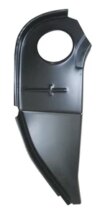
1966-1967 Cowl Shoulder Panel Side (LH)
The 1966–1967 Cowl Shoulder Panel Side (LH) (often cataloged by manufacturers as the cowl side outer rear panel) is a targeted stamped-steel replacement section for the driver’s side of first-generation GM A-body vehicles.
Positioned directly behind the front fender line and running rearward toward the upper door hinge pillar, this “shoulder side” skin forms the exterior wall of the fresh-air cowl plenum chamber. Because water, dirt, and wet leaves pool in this dead zone, it acts as a notorious moisture trap that rots out from the inside, letting rainwater leak directly onto the driver-side interior kick panels.
📐 Component Specs & Stamping Profile
Corrosion Defense:
- These panels are manufactured from heavy-gauge automotive steel and come coated in a black EDP (Electro Deposit Primer) to prevent flash rust before and after installation
- Application Fitment: While specifically labeled for the 1966 and 1967 Chevrolet Chevelle, Malibu, and El Camino, this identical factory-profile stamping is shared with other A-body muscle cars of the same era, including the Pontiac GTO/LeMans, Oldsmobile Cutlass/442, and Buick Skylark.
🔧 Critical Restoration & Installation Notes
- Side vs. Front Panel Distinction: Ensure you are tracking the correct slice of metal for your repair. Suppliers split this region into the Cowl Shoulder Panel Front (the forward-facing section near the firewall seam) and the Cowl Shoulder Panel Side (the section transitioning rearward toward the pillar skin).
- The “Hidden Damage” Caveat: Professional restoration experts warn that rust on the cowl shoulder is rarely just skin-deep. When you cut away the visibly rusted outer side patch, closely inspect the underlying structure. The inner cowl side panel, internal fresh-air drop vents, and the lower hinge area reinforcement bracket are frequently rotted or heavily scaled beneath it.
- Weld Prep & Attachment: To install this patch, you must temporarily remove the driver’s side front fender and door. The panel is typically clamped into position, marked, and secured using a continuous series of plug welds or factory-style spot welds along the pre-existing sheet metal pinch welds. Ensure you scuff away the EDP primer at your exact weld points to achieve proper penetration.
- Sealing: Because this area is directly exposed to heavy water drainage from the upper windshield cowl slots, applying a premium automotive urethane seam sealer over the finished perimeter welds is highly mandatory to guarantee an airtight, waterproof barrier.


Reviews
There are no reviews yet.